

How To Calibrate Camera Lens
The nearly frustrating thing subsequently a long twenty-four hour period of shooting is to find yourself with blurry images. If this is happening across multiple images, and so information technology might not exist down to your focusing skills.
You lot might have a focus misalignment result on your DSLR camera or lenses. You'll demand to calibrate your camera to ensure your lenses can focus on a subject correctly.
Worry not, even so: in nigh cases, this is an easy process that tin can exist washed in-camera by you lot.
 [Note: ExpertPhotography is supported by readers. Product links on ExpertPhotography are referral links. If you use one of these and buy something, we make a little flake of money. Need more info? Run across how it all works here.]

Why Do Y'all Need to Calibrate Your Lenses?
The offset thing you need to at least vaguely understand is how autofocusing works in DSLRs. In a DSLR machinery, there are (at to the lowest degree) 2 divide sensors: one for imaging, and a secondary ane for autofocusing.
There are also mirrors that direct the light either to our centre or to the imaging sensor. By default, the mirrors are engaged. A portion of the incoming light hits the secondary sensor, and the residual travels upward through the viewfinder to your eyes.
When the y'all half-press the shutter button to autofocus, the secondary sensor interprets the low-cal and instructs the lens to focus in a sure way. Information technology uses a technology called phase detection.
It's important to see that this procedure doesn't check if the resulting shift actually places the subject in focus, because information technology cannot, by blueprint.
Then, when yous take a motion picture, the mirrors rise and of a sudden all light hits the master (imaging) sensor.
Take a look at our graphic that shows a simplified diagram of a DSLR'due south insides.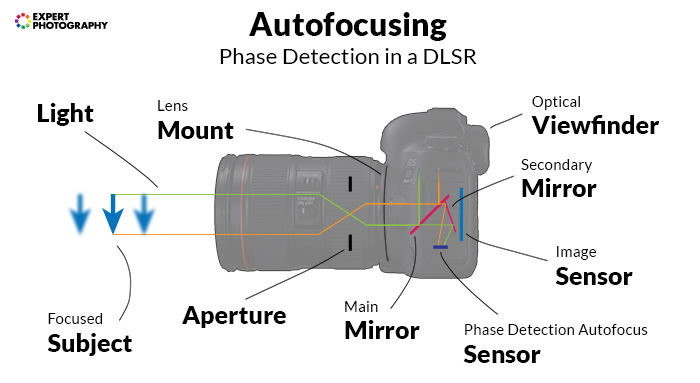
The problem arises when the two sensors are misaligned. In this instance, something that was in focus on the AF sensor will not exist focus on the imaging sensor. Your final photo will show a shift in focus: it volition be blurred where information technology should accept been sharp.
There's too a take a chance that some parts in your lens are not exactly aligned in the aforementioned way as the factory standard would require. This can also issue in misinterpretation by the focusing sensor.
In both cases, you need to calibrate (or micro adjust) your photographic camera and lenses to work perfectly together. Autofocus micro adjustment tells the camera to interpret the secondary sensor's results differently from default.
Note that yous simply accept to exercise this in DSLRs. Mirrorless cameras cross-check focus at the end of the focusing process as well, so they are not prone to misalignment bug. Still, some mirrorless cameras offer scale: this is to make autofocusing quicker with adapted lenses in Sony and Nikon cameras.
When Should You lot Calibrate Your Lens?
In full general, if you find consistent misfocusing issues on your camera, either with a specific lens or all lenses, you should bank check if they are calibrated correctly.
The chances of having to practise it are low if yous purchase everything make new and at roughly the same fourth dimension.
Only if yous use older lenses with new camera bodies, or vice versa, or if you go your gear 2d-hand after years of use, information technology's a lot more likely.
You should also re-check your lens and camera if yous'd dropped them. Even if there's no sign of damage on the outside (these things are tough!), some parts could've become misaligned.
Remember that you may also need to calibrate your lenses again when you buy a new camera. Since the new one is not familiar with the optical adjustments you made (and itself might not be spot-on), you'll need to calibrate them again.
Accessing Calibration in the Camera
In one case you calibrate lens, y'all normally don't demand to do information technology again. Your photographic camera stores a 'preset' that remembers the adjustments of any particular lens.
The presets are useful, especially since no two optical devices have the same adjustments. For example, you have the option to save your calibration for an old 50mm lens and shop some other preset for an 85mm.
The methods of saving your adjustments vary from one manufacturer to the next. Nosotros advise you lot consult your manual to help you figure out the procedure.
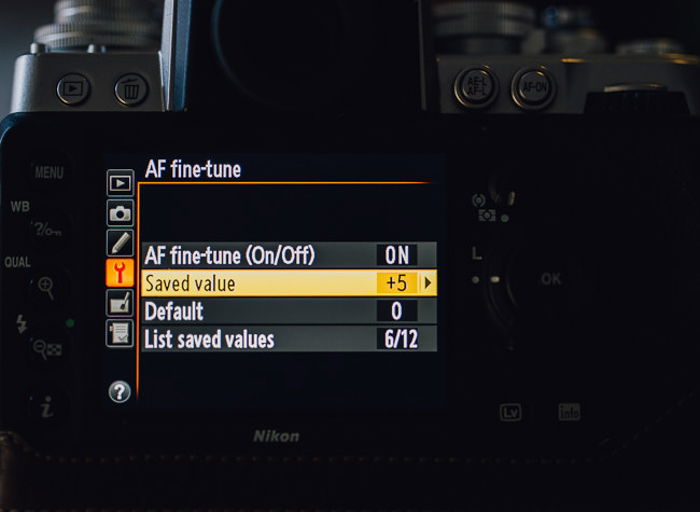
For my Nikon D850, I can detect this feature is nether the AF Fine-Tune menu. After I calibrate lens, I go to List Saved Values to save my adjustments. (You'll learn more than about this later).
How Do You Calibrate Your Lenses?
When most people hear the discussion 'calibrate,' they think of something obtrusive and challenging to complete. With lens calibration, it's effortless.
Nevertheless, this process requires a lot of attention. Y'all need to brand sure that the calibration y'all just did on your camera lens is precise and accurate.
Apart from the calibrator, yous don't need special tools to do calibrations. All you lot demand for the most part is to push a few buttons and a lot of patience.
Without further ado, allow's go on with the step-by-step procedure!
Utilize the Optical Viewfinder
Focus using the viewfinder, not Live View, as LV focusing is an entirely different thing.
Focusing in Alive View will always yield sharp results if the bailiwick is stable, considering it uses the imaging the sensor to grab focus instead of the dedicated autofocus sensor.
Prepare Upward Your Calibrator
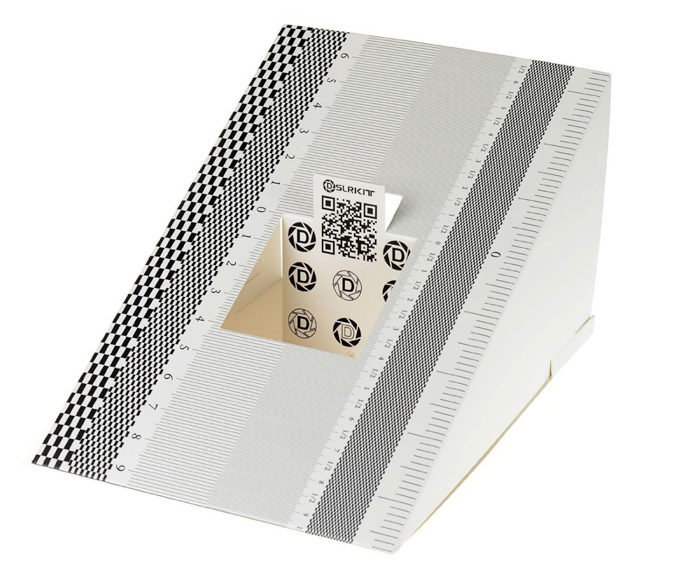
The first affair yous need is a lens scale chart or focus pyramid. It works best with a few minutes in a tranquility surroundings. You can get the lens calibration chart at a reasonable price. There are more expensive options, just this works well for focusing lenses.
We use the DSLR KIT Lens Focus Calibration Tool, and it works perfectly.
If you don't have a focus calibration tool, you tin can also use a regular ruler to do it. The only downside is that it may not exist equally precise as the commercially available options.
Calibrating with a Regular Calibrator
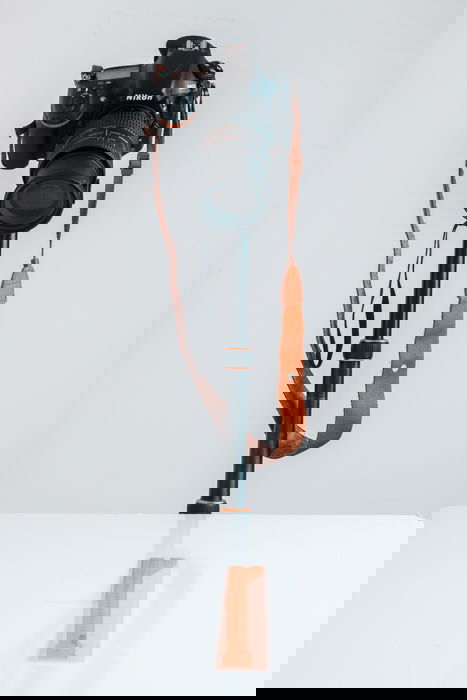
To start calibrating your lenses, set upwards your camera on a tripod or a flat surface such as a table.
Ensure both the camera and ruler are level. They should exist exactly perpendicular, and at the same height.
Adjacent, identify the focus pyramid on a level surface a few feet from your lens. It doesn't matter if it is vi or ten feet away. The correction is universal to all distances.
Now prepare the lens to the widest aperture to obtain the shallowest depth of field. Doing so volition brand it easier to determine if your lens is focusing accurately.
While using the viewfinder, autofocus on the crosshair at the centre of the ruler. Once y'all finish that, accept a photo. Information technology would be your heart focus point.
Calibrating with a Ruler
If you don't have a calibrator, you lot can accommodate your autofocus with a ruler as well.
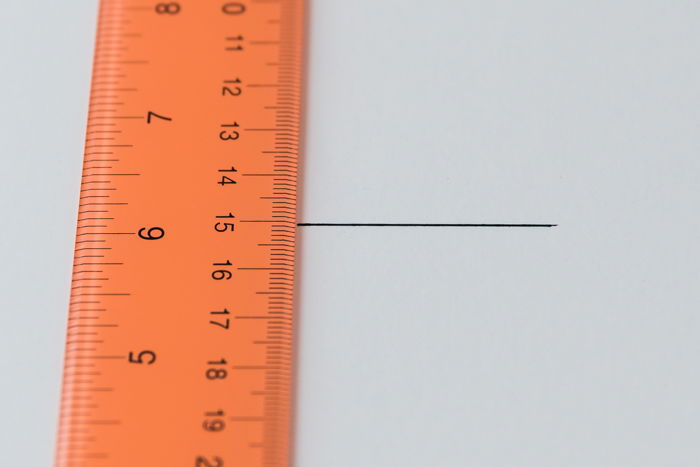
All y'all have to practice is to place a white poster board on a low table or the floor. Next, draw a horizontal line in the middle with a pen or a pencil using your ruler. It doesn't have to run through the entire length of the board. two to five inches should be plenty.
Now cull a number in the eye of your ruler and align information technology with the line. For our example, we'll exist using the 15 centimetre mark.
Keep in mind that the ruler needs to be vertical and the line should exist horizontal.
The line you lot drew also has to line upwards perfectly with the fifteen centimetre marker on the ruler.
Now mount your camera on a tripod and point it downwards toward the lath. Look through your viewfinder and brand sure that the ruler and the line are in the frame.
Set your photographic camera to Aperture Priority and choose your widest discontinuity. For my 28-85mm lens, information technology was f/3.5. The narrow depth of field information technology creates allows you to better pinpoint the sharp and blurry parts in the paradigm.
Use your autofocus and target the middle of the line on the affiche board. In one case yous lock your focus take a picture.
During this process, don't turn on your live view since information technology doesn't e'er focus accurately. Instead, y'all should simply employ your viewfinder.
After yous press the shutter, review the photograph you simply took. Feel free to zoom into the image to help you lot ameliorate examine the details.
The concept behind this method is the same as using a regular calibrator. If the 13 or 14 centimetre marks are sharper than fifteen, so you have a dorsum focusing problem. If 16 or 17 are sharper than 15, then you have a front end focusing problem.
Now the next step is going to be a bit tricky: You'll need to gauge how much you want to adapt the fine-tuning. If you have a back focusing problem, you'll need to go downwardly. If information technology'due south front end focusing, y'all'll need to go up. But by how much? You lot'll just have to eyeball it.
It will take a few tries until you become the 15 centimetre mark to look abrupt. But once you smash the focus, yous're good to get!
Tethering the Camera
After you lot take a photograph, audit the photo to see if focusing is accurate. We recommend that you do this on a reckoner since you can come across meliorate on a bigger screen.
If you desire, yous tin even tether your camera during this process.
Tethering simply means connecting your camera to your reckoner. That manner, you tin take pictures remotely and view them directly on your screen. For this you volition need to:
- Check hither to make certain your camera is supported.
- Connect the camera to your computer or laptop using the supplied USB cable
- Go to File>Tethered Capture in Lightroom.
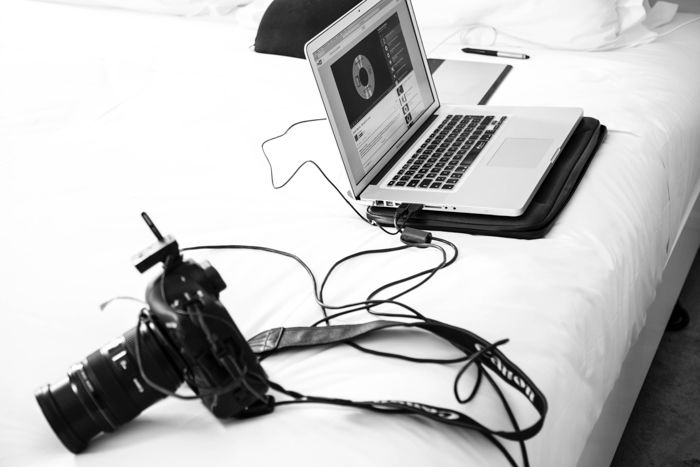
Once Lightroom recognises your camera, you're ready to start shooting. You can either press the shutter button on your device or click on the virtual shutter button that appears on Lightroom.
After you take a photo, it then appears in Lightroom. Review the image to see if everything is sharp. Experience free to zoom into the picture.
If focusing is accurate, the '0' on the lens calibration nautical chart should exist the sharpest point on the image. The other numbers should become blurrier equally you move away from the '0'.
If whatever number above the 0 is sharper, and then your lens is doing something called dorsum focus. If whatsoever number below the 0 is sharper, you have afront focus upshot.
In either case, you need to right your lens for abrupt focus. You exercise this using the motorcar-focus micro-adjustment parameters on your camera torso.
Adjust until you tin obtain a picture that is sharpest at the '0' on the ruler.
Fixing the Trouble: Nikon DSLRs
On Nikon cameras, you need to look for the AF fine-tune Carte du jour in the camera settings. You can find this past clicking on the menu button and so selecting the wrench section.
When y'all click on this setting, you'll find some adjustable parameters. Ensure the AF fine-tune is ON. Here, you lot only want to change the 'Saved value.'
As we mentioned before, our camera volition recollect the changes each time you place that lens on your camera. Then y'all but demand to apply the focal lens calibration in one case for each lens.
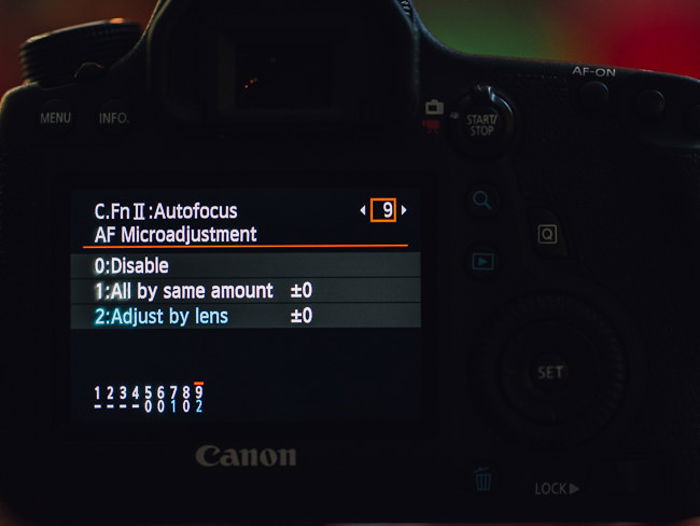
Fixing the Trouble: Canon DSLR
For Catechism Cameras, start by accessing the Menu, and scroll to the Office area, then Automobile Focus settings. Make sure you enable the Autofocus AF Micro aligning.
Utilize the Adjust past lens values to correct and fine-tune your focusing. And that's it, AF scale consummate.
You should be fix and ready to shoot. Exercise this for every lens, and then again, if you lot have multiple cameras.
Fixing the Problem: Other Cameras
I suggest that y'all consult your camera manual and follow the instructions to calibrate lens. The menu items and the names may be unlike. Merely for the virtually function, the process should be like.
The adept news is that lens calibration isn't exclusive to professional cameras. Even most entry-level options have them.
As I mentioned earlier, apart from DSLRs, some mirrorless options also have this feature, but for a different reason. If you attach a DSLR-designed lens on a mirrorless using an adaptor, your focus will exist sharp, just it won't necessarily exist quick. Calibration can speed upward autofocusing.
Tin You Calibrate Your Lenses Using Software?
Manually calibrating your lenses is quite piece of cake to do. But sometimes, it tin can exist challenging to confirm whether or not the adjustments we fabricated were precise.
If you want to ensure accuracy when calibrating, nosotros suggest you use dedicated software such every bit Reikan Focal. Instead of only eyeballing your adjustments, this program confirms whether the parameters you set are accurate.
Since Reikan is a software, it's a bit pricier than regular calibrators. But if your career requires precise focusing such equally product photography, then it'due south definitely worth the investment.
FoCal comes with a calibrator which you can record onto your wall. Once you lot upload the software, yous tin can tether your photographic camera, and the program volition instruct yous where to position your device in front end of the calibrator accurately.
Once you lot set your camera's position, you can and then start the calibration process.
Choose Fully Automatic Calibration with User Aid. The program will so kickoff taking photos without you having to do it. If it needs you to conform parameters, y'all'll hear a vox prompt telling you lot which values to utilize.
For the adjacent role, you lot'll need to become to the camera's autofocus settings and change the calibration values yourself. Y'all tin can't do this from your computer, so you need to access your device's Menu to make the adjustments.
Expect to hear a few voice prompts from FoCal until the examination is complete. In general, the entire examination just takes a few minutes.
Keep in heed that using software for scale isn't necessary for well-nigh people. In near cases, doing the procedure manually is enough. But it's adept to know that programs such as the FoCal exist if y'all need accurate adjustments.
Conclusion
Calibration should be one of your priorities, peculiarly if you're a professional photographer.
This process may not seem equally critical for you right now. But recall that using lenses that don't focus well with your camera can cost you your career. After all, nobody's going to hire someone who submits a folder filled with blurry files.
Get into the habit of fine-tuning your automobile-focus. Knowing that your lenses produce sharp images will requite you the confidence you need to go the chore done.
Learn all the skills to become into photography with our Photography for Beginners course!

Source: https://expertphotography.com/lens-calibration/
Posted by: hopkinsothy1941.blogspot.com
0 Response to "How To Calibrate Camera Lens"
Post a Comment